Vintage Online Shop

Personalization Available
Over 3000 5-Star Reviews on Etsy
Multiple Payment Options
Vintage Online Shop

Personalization Available
Over 3000 5-Star Reviews on Etsy
Multiple Payment Options

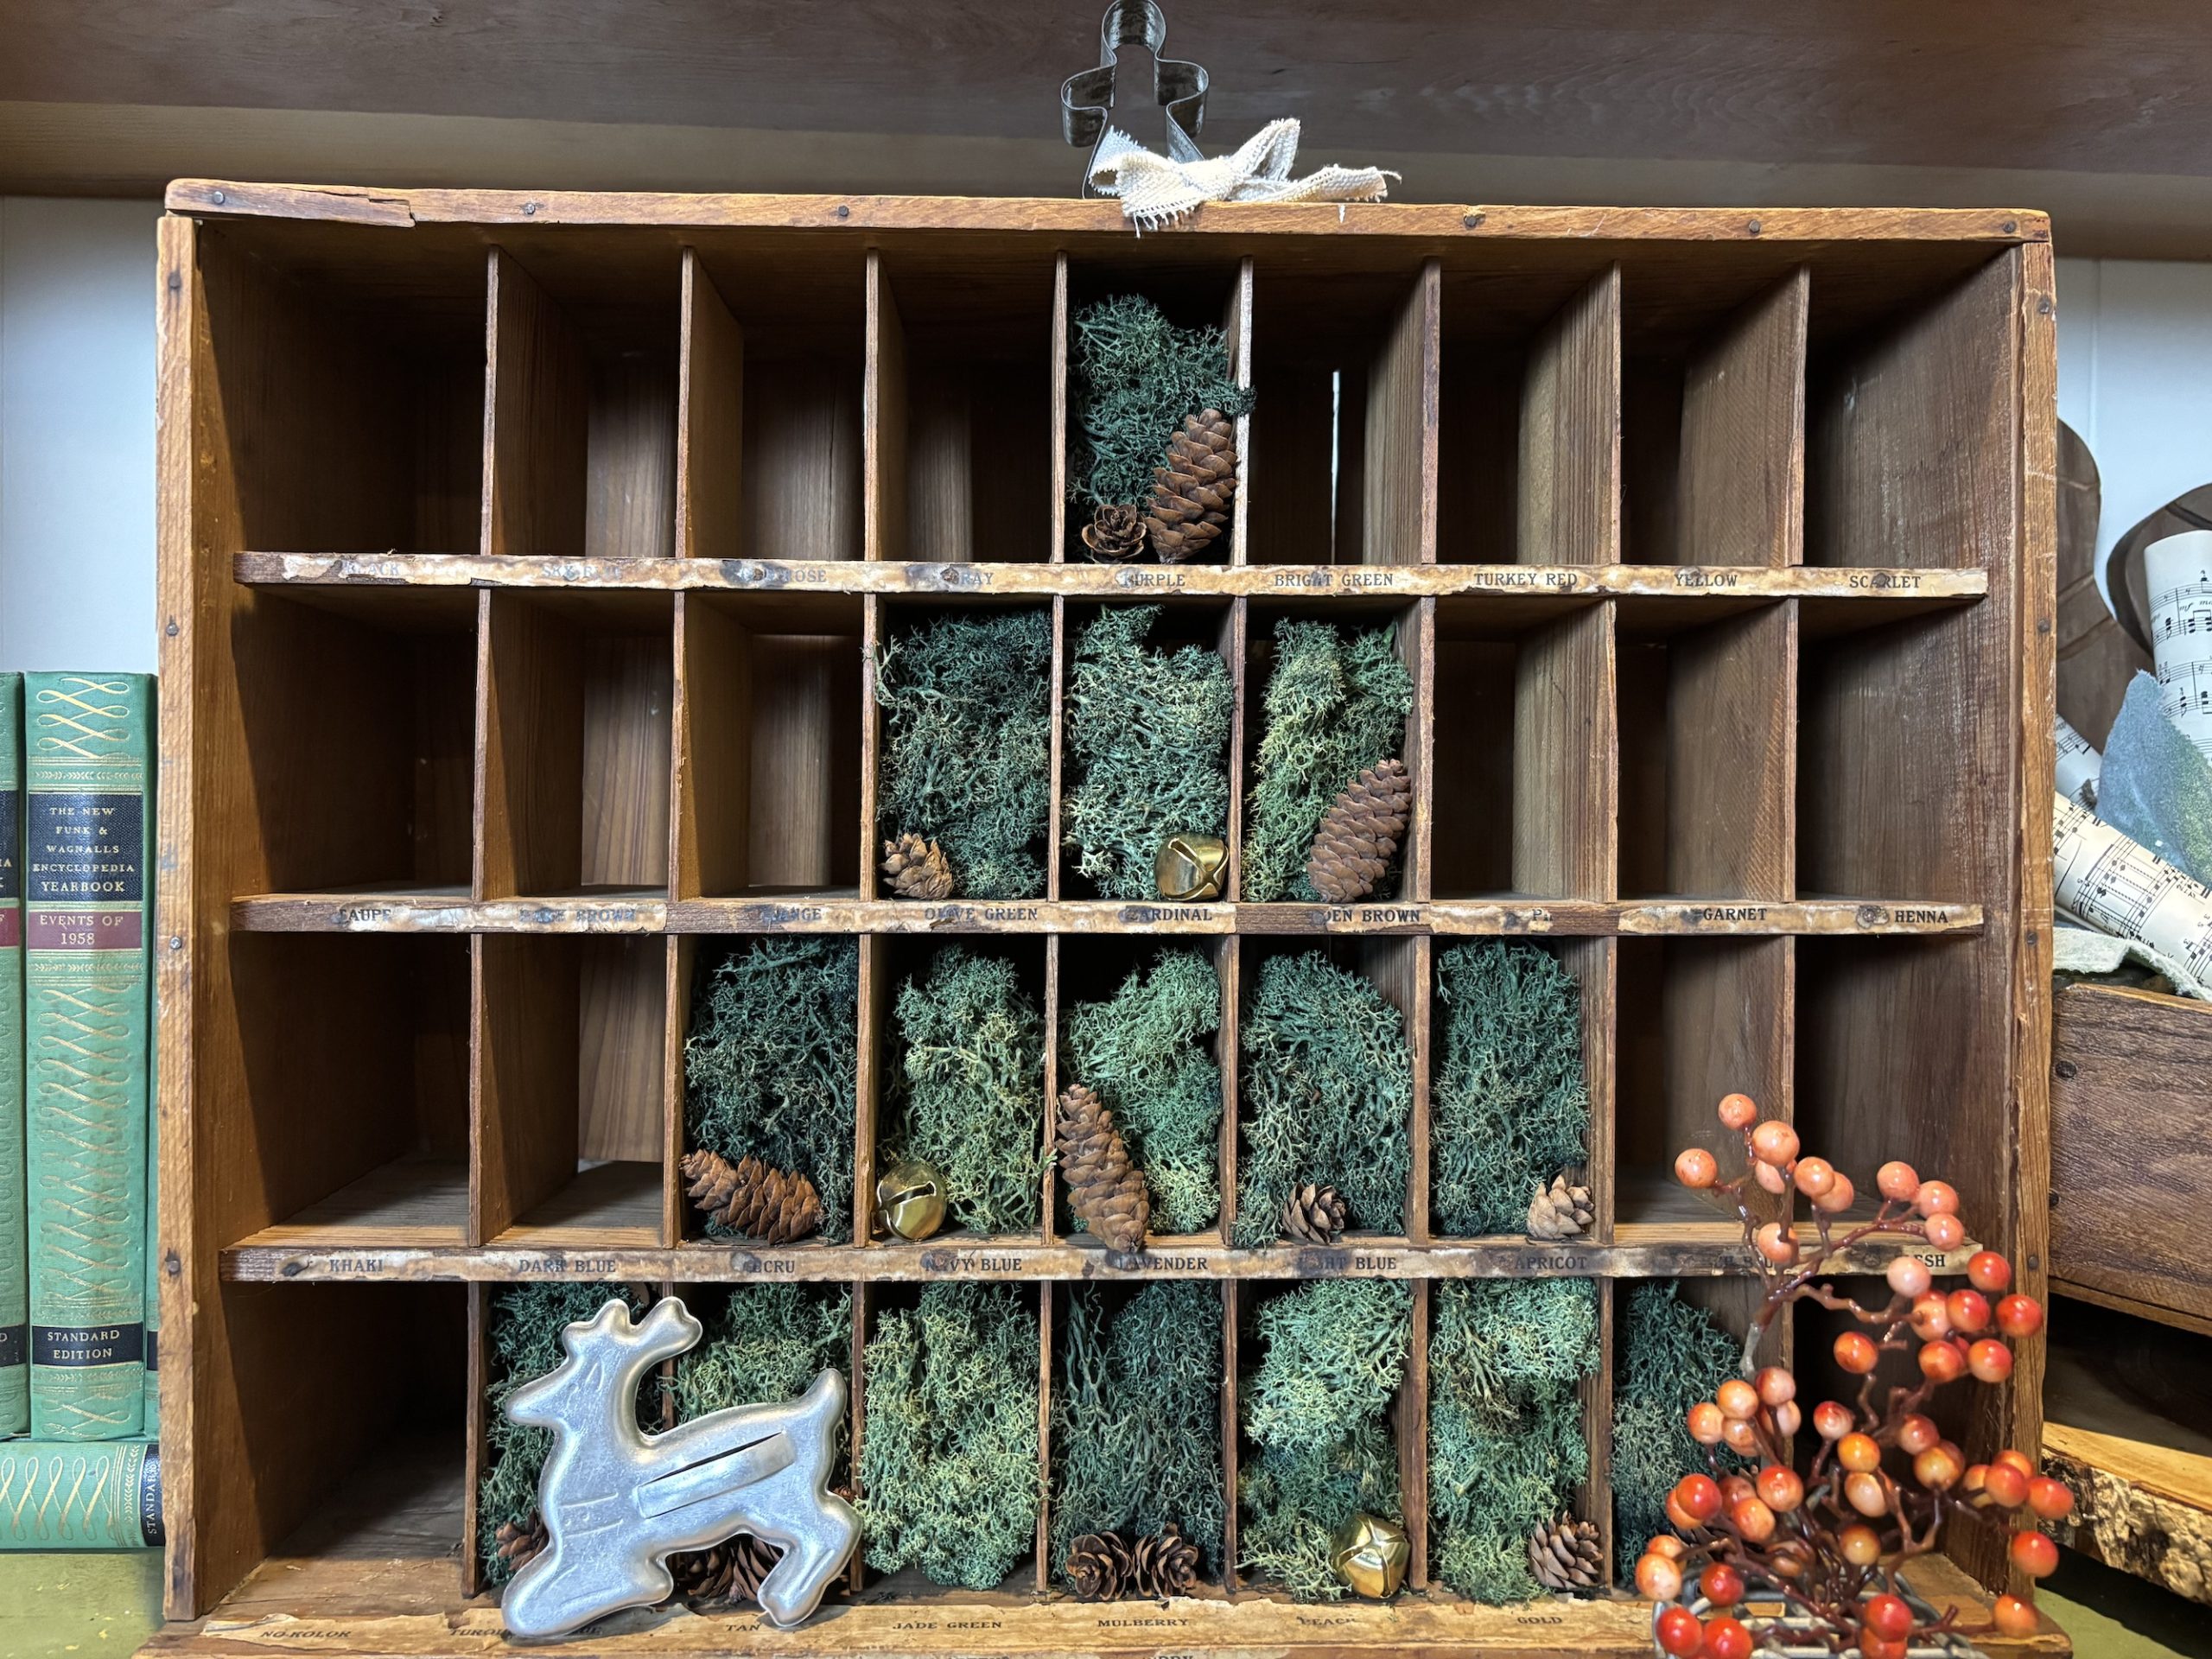
Vintage DIY Project: Transform a Wooden Sorter into a Charming Christmas Tree
If you love vintage decor, easy-to-do DIY projects, and unique ways to celebrate the season, this simple Christmas craft is perfect for you! Using a vintage wooden sorter—like an old general store display rack, a printer’s tray, or a cubby shelf—you can create a one-of-a-kind Christmas tree that’s both festive and reusable.
Ready to bring a touch of vintage charm to your holiday decor? Let’s dive in!
What You’ll Need
Step 1: Find Your Vintage Sorter
The heart of this DIY project is the vintage sorter. Its cubbies make it the perfect base for creating a charming tree shape. Whether it’s a weathered printer’s tray or an old ink display, the imperfections and patina will only add to its charm. You could even make your own if you’re feeling crafty!
Can’t find the perfect piece? No worries—any wooden organizer with cubbies will work!
Step 2: Shape the Tree with Moss
Start by envisioning a tree shape. Begin at the top center cubby and fill it with moss. Then, work your way down, adding moss to one cubby on each side as you expand outward.
Here’s my approach: Use two shades of moss to create depth and visual interest. For example, darker moss in the center and lighter moss around the edges will give your “tree” a beautiful layered effect. Or you can mix it up just for some variety. You really cannot do this project “wrong.”
This step is super easy—no glue is necessary unless you want the moss to stay in place long-term.
Step 3: Add Simple Christmas Embellishments
Once your tree shape is complete, it’s time to decorate! Add small ornaments, miniature bells, or twinkling fairy lights to bring your tree to life. Stick to a color palette that fits your vintage style—like soft metallics, muted reds, or rustic whites. Each person’s tree will look different…because it will be decorated just the way YOU like it!
For a whimsical touch, tuck tiny figurines, snowflakes, or even pieces of ribbon into the moss. The possibilities are endless, so have fun!
Why You’ll Love This Easy-to-Do Project (Or Why I Love It!)
Quick and Simple: No power tools, no mess—just a little creativity and a few supplies.
Reusable Pieces: Once the holidays are over, you can remove the moss and decorations. The vintage sorter can be repurposed as a mail holder, display piece…or more!
Vintage Christmas Charm: The combination of rustic wood, natural moss, and timeless embellishments gives this project a cozy, nostalgic feel.
A Unique Take on Vintage Christmas Decor
This DIY project is more than just a craft—it’s a way to celebrate the season with creativity and heart. It’s perfect for anyone who loves vintage finds, simple projects, and decor that tells a story.
So, grab your wooden sorter, some moss, and a few festive touches. In just a few easy steps, you’ll have a charming Christmas tree that’s as unique as you are.
Happy creating, and may your holiday season be filled with vintage goodness!
Warmly,
Sandy
Owner, Whimsy Barn